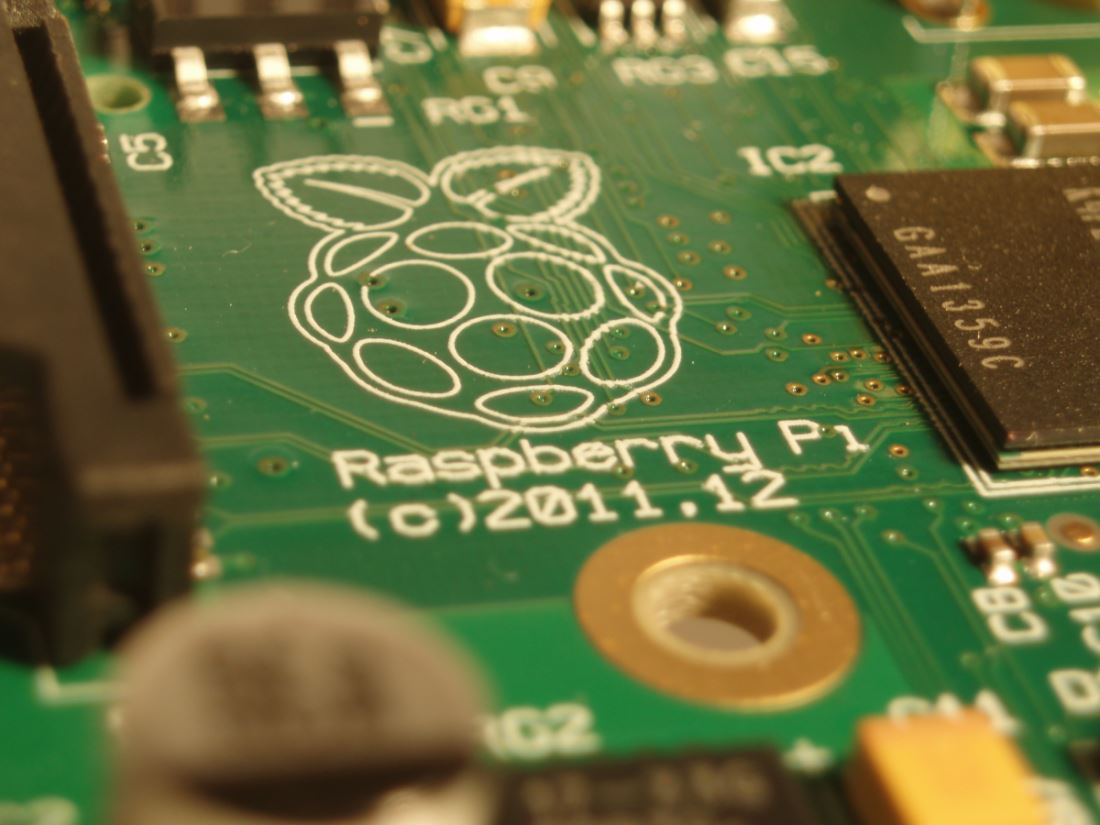
My First Raspberry Pi
2014-02-17I have heard a lot about this small cheap computer that you can do a lot of cool stuff with and that computer is called Raspberry Pi. So, now finely, I have got one of my own. In this blog post I will show you how to get started with a new Raspberry Pi, from the installation to the first Hello World application.
At the moment there are two models of the Raspberry Pi and that is mode A and model B. There are basically 4 differences and they are that model B has one more USB port, a network port, more memory and it’s a bit more expensive.
In this blog post I will use the Raspberry Pi model A.
Install software
Let’s get started with the installation of the operating system on the Raspberry Pi. To be able to install the operating system you need an SD card and another computer where you can connect the SD-card.
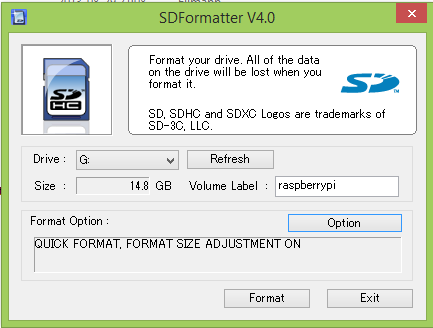
Before installing the operating system on the SD-card, you need to format the card.
Download the SD card formatting application from SDCard.org
Install it on your computer and then run the SDFormatter application.
When the card is formatted, download the RaspberryPi installation from RaspberryPi.org
Unzip all the files that you just downloaded and then copy the folder NOOBS_v1_3_3 to your SD card that you just formatted.
Now you actually have the installation files for several operating systems on the SD. This means that we are ready to install one of the operating system. So, from now on we need to use the Raspberry Pi hardware to do the work.
Setting up the hardware
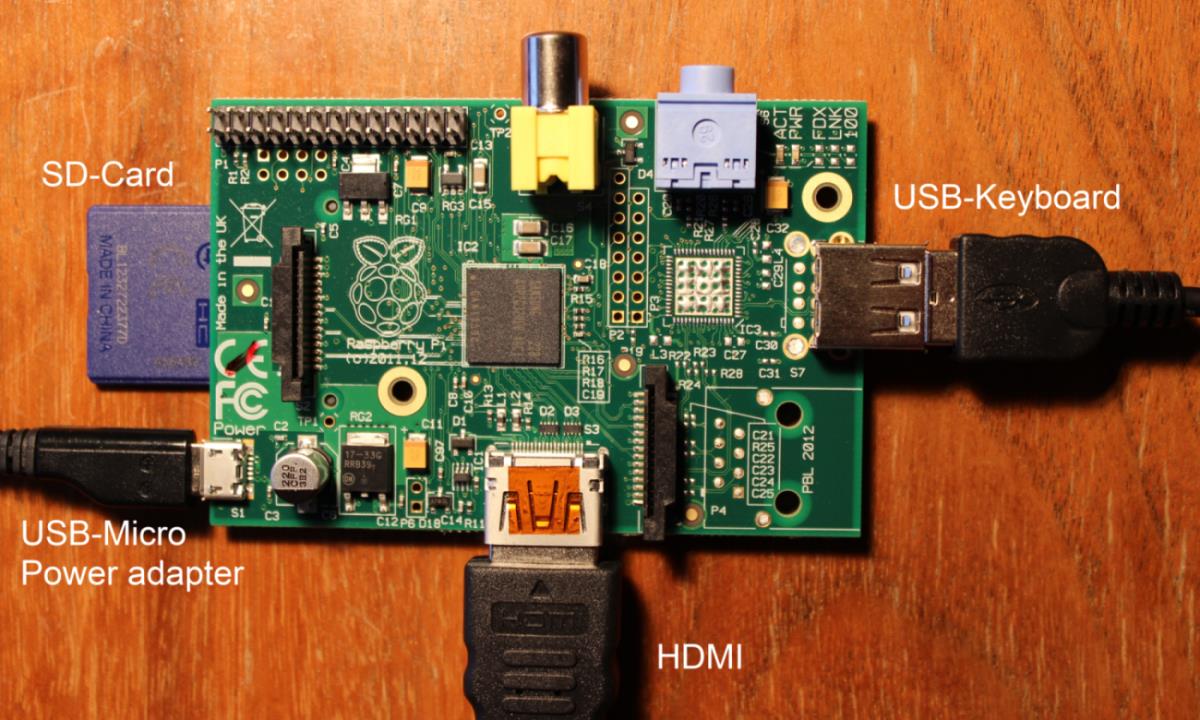
There are a few things to connect to the Raspberry Pi to be able to use it. You at least need to connect these things to be able to install the Operating System:
- Memory card SD with at least 4 GB
- A power adapter with a USB-micro connection
- HDMI cable
- USB keyboard
In this picture you see how all the cables and memory card is connected to the Raspberry Pi.
Installing the Operating System
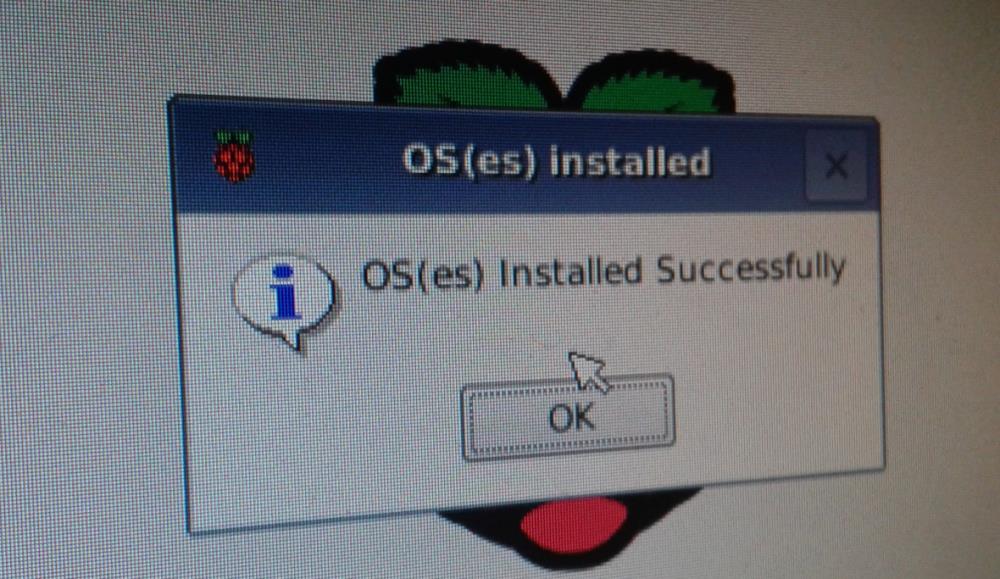
After setting up the hardware, it's now time to start the Raspberry Pi and install the operating system. When you give the Raspberry Pi power, it automatically starts and it will load the installation software for the Operating Systems. At the moment there are 6 operating systems to select from. I decided to go with the Operating System Raspbian. The installation takes just a few minutes and then you are done with the installation.
The default login is pi / raspberry
Hello World!
Since I'm a developer the first thing I wanted to do when I have my newly installed Raspberry Pi computer is of course to create a Hello World program. It seems like the default language for Raspbian is Python (you can of course use others also). So I will try to do my first Python program.
The first thing you need when you create a program is text editor where you can write your source code. In Raspbian there is already text editor called "nano" that you can use.
Type this command to open the text editor nano and create a new file called HelloWorld.py.
$ nano HelloWorld.pyThen type this code to create the Hello World application.
#!/usr/bin/python
import sys
print “Hello World!”
You save and close the editor with this key combination: Crtl + X
To execute the application you type this command.
$ python HelloWorld.pyThe output on the screen was this.
Hello WorldGreat everything seems to be working then.
A Model A problem
There is one thing that makes it a bit more complicated to work with Model A compared with Model B and that is that there is only one USB port on the Model A. Maybe you are thinking "What is the problem with that?". Well the problem is that when you have connected your USB keyboard into the only USB port on the Raspberry Pi, then you have no port left to get things into the Raspberry Pi, like from a USB-memory stick. So you have no way of getting things like pictures, code, applications into the SD-card to the Raspberry Pi and that is a bit boring. Note, it's not possible to just put the SD-card back in you windows computer and copy things to that card.
One way of solving this problem is to put a USB-hub into the only USB-connection on the Raspberry Pi and then for instance put the keyboard and a USB-memory stick with your picture, code, application in USB-hub. Note that it must be an externally powered USB-hub, since the Raspberry Pi does not have enough power to drive the memory stick. The Raspbian operating system is not automatically detecting a new USB memory stick, so you need to do a bit of work to connect it.
First you need to find what sda number the memory stick has by typing this command in the console:
$ sudo ls /dev/sd*So, if your memory stick got the sda1 number, you just type this command to mount the memory stick:
$ sudo mount -t vfat /dev/sda1 mnt/usbNote, if you don’t have the folder mnt/usb, you must first create it with help of the command mkdir.
Now you are done and can copy things from your USB memory stick.
Great the Raspberry Pi is now setup and ready to use, so the next step is to figure out what cool project to use it for.
Interesting Links: