How to create a Live Tile to Windows 8.1 for websites
2013-12-04With Tiles for apps in Windows 8, you get an easy way to know if there is something new or interesting in that app without opening the actual app. With Windows 8.1 it's now possible to create Live Tile for webpages also. In this blog post I will show you how to create a dynamically updated Live Tile for a web page for Windows 8.1.
In Internet Explorer 11 there are 3 ways to define customized Live Tiles and notifications for pinned sites. These 3 ways are in the HTML metadata, java script for periodic notification, xml browser configuration.
Note this could not be done from the desktop version of Internet Explorer.
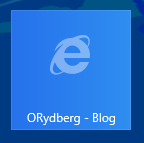
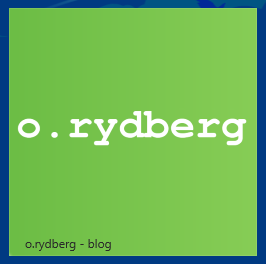
If I don’t do anything and then try to put my blog on a Tile on the start screen, then I will get a Tile that looks like this and will take the text from the title tag in the html on the page from where the Tile was created. If your web site does not have favicon, the Internet Explorer log is displayed instead.
Now let’s take it from the beginning, creating the simplest Tile possible and with that I mean creating a custom static Tile with just a text on it.
<meta name="application-name" content="o.rydberg - blog" />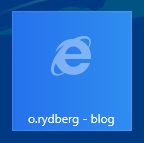
The next step is to put the blogs background color to the Tile and that is done with this meta tag.
<meta name="msapplication-TileColor" content="#6CBD45" />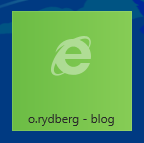
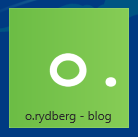
Now, let’s replace the Internet Explorer logo with a custom image. To do that we need to know what Tile sizes are available in Windows 8.1. So, this is a table of the sizes that could be selected:
| Tile size | Standard Tile dimensions | Recommended image size |
|---|---|---|
| Small | 70 x 70 | 128 x 128 |
| Medium | 150 x 150 | 270 x 270 |
| Wide | 310 x 150 | 558 x 270 |
| Large | 310 x 310 | 558 x 558 |
Create the image sizes Small, Medium, Wide and Large to support all 4 sizes of Tiles. Note that the “o.” and “o.rydberg” are images even if they look like text. Then you also need to specify the connection between the Tile size and the name of the image that you want to display in the Tile with these meta tags.
<meta name="msapplication-square70x70logo" content="images/win8LogoSmall.png" />
<meta name="msapplication-square150x150logo" content="images/win8LogoMedium.png" />
<meta name="msapplication-wide310x150logo" content="images/win8LogoWide.png" />
<meta name="msapplication-square310x310logo" content="images/win8LogoLarge.png" />


Live Tiles
What I have showed you so far is a custom Tile that never changes its appearance, now we are going to look at Livet Tiles and that means that we for instance can get news from the websites RSS feed to be displayed in the Tile.
If you already have a RSS feed for your website, you can take help from the http://www.buildmypinnedsite.com website. This site helps you generate some of the metadata that I showed earlier in this post. It also helps you to convert your RSS feed to a notification file that the Live Tile can read from.
As an example when I entered the information for my blog it generated this metadata for my Live Tile:
<meta name="msapplication-notification"
content="frequency=360;
         polling-uri=http://notifications.buildmypinnedsite.com/?feed=http://orydberg.azurewebsites.net/rss/rss.xml&id=1;
         polling-uri2=http://notifications.buildmypinnedsite.com/?feed=http://orydberg.azurewebsites.net/rss/rss.xml&id=2;
         polling-uri3=http://notifications.buildmypinnedsite.com/?feed=http://orydberg.azurewebsites.net/rss/rss.xml&id=3;
         polling-uri4=http://notifications.buildmypinnedsite.com/?feed=http://orydberg.azurewebsites.net/rss/rss.xml&id=4;
         polling-uri5=http://notifications.buildmypinnedsite.com/?feed=http://orydberg.azurewebsites.net/rss/rss.xml&id=5;
         cycle=1"/>
The Live Tile can only handle that 5 items are displayed in the Live Tile and that is way there are 5 entries in the code above. You should also note that in the metadata its first calling the http://notifications.buildmypinnedsite.com, and the reason for that is that it’s converting my RSS-feed to a Notification File for my Live Tile. The benefit of this is that I sort of only have to produce one news file and that is the RSS-feed.
The frequency parameter specifies what frequency the Live Tile is checking the Notification File and the number is in minutes. The supported values are 30, 60, 360 (6 hours), 720 (12 hours), and 1440 (1 day), If nothing is specified, the default value of 1440 minutes. Since this is a blog and it does not update that often, I selected the 6 hour update frequency.
This is an example on how Wide Live Tile looks like when I use my RSS feed and then convert it with help of the http://notifications.buildmypinnedsite.com site.
Move Live Tile code from meta tags to XML file
Instead of putting all these meta tags in all your HTML page, you could put Live Tile meta tags into a XML file instead. This will of course have big benefits if you would like modify anything in your Live Tile definitions. I mean that you only have to modify the code in one place instead of in all your pages.
You still need to have two meta tags in all your web page and that is one for the name of your application or web page and one for a reference to the XML file that has your Live Tile definitions. The meta tags in your webpage could look like this:
<meta name="application-name" content="o.rydberg - blog"/>
<meta name="msapplication-config" content="http://orydberg.azurewebsites.net/browserconfig.xml" />
Then the browserconfig.xml file will contain this code and that is the same thing as what I have specified as meta tags in the webpage earlier in this post.
<?xml version="1.0" encoding="utf-8" ?>
<browserconfig>
  <msapplication>
    <tile>
      <square70x70logo src="images/win8LogoSmall.png"/>
      <square150x150logo src="images/win8LogoMedium.png"/>
      <wide310x150logo src="images/win8LogoWide.png"/>
      <square310x310logo src="images/win8LogoLarge.png"/>
      <TileColor>#6CBD45</TileColor>
    </tile>
    <notification>
      <polling-uri src="http://notifications.buildmypinnedsite.com/?feed=http://orydberg.azurewebsites.net/rss/rss.xml&id=1;
                polling-uri2=http://notifications.buildmypinnedsite.com/?feed=http://orydberg.azurewebsites.net/rss/rss.xml&id=2;
                polling-uri3=http://notifications.buildmypinnedsite.com/?feed=http://orydberg.azurewebsites.net/rss/rss.xml&id=3;
                polling-uri4=http://notifications.buildmypinnedsite.com/?feed=http://orydberg.azurewebsites.net/rss/rss.xml&id=4;
                polling-uri5=http://notifications.buildmypinnedsite.com/?feed=http://orydberg.azurewebsites.net/rss/rss.xml&id=5"/>
      <frequency>360</frequency>
      <cycle>1</cycle>
    </notification>
  </msapplication>
</browserconfig>
The frequency tag is setting the interval in seconds that Windows is looking for new content from the website.
Create your own Notification Tile File
In the earlier example I used the notifications.buildmypinnedsite.com to help me to convert my standard rss.xml file to a Notification Tile file. But it’s also possible to create your own notification file that has a custom design for each of the different tile sizes. If you create your own custom notification file, you need to update the content in that file at the same time as you update your rss.xml file. So this adds an extra maintenance task to your notification work, if you don’t create an automated way to create this notification file. The benefit is of course that you get more control over of each Tile size will look for your user. You can also specify how a Tile size should look for a specific pooling-uri and this is nothing that you could have done with the notifications.buildmypinnedsite.com.
But now we are going to look at how you manually can create a notification file. I also said that you can have a custom design of the Live Tile and that is specified in this notification file. Please have a look at the Tile template catalog (http://msdn.microsoft.com/en-us/library/ie/hh761491.aspx), to see what Tile templates that you want to use. There is a large amount of templates there, everything from just text to once with just a picture to once with pictures and text.
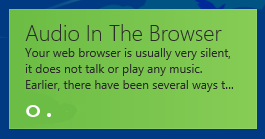
An example of a notification file could look like this. This example of the notification file has information for the 3 of large Tile sizes that can handle Live Tile updates with text.
<tile>
  <visual lang="en-US" version="2">
    <binding template="TileSquare150x150Text04" branding="logo" fallback="TileSquareImage">
      <text id="1">Audio In The Browser</text>
    </binding>
    <binding template="TileWide310x150Text09" branding="logo" fallback="TileWideImage">
      <text id="Text1">Audio In The Browser</text>
      <text id="2">Your web browser is usually very silent, it does not talk or play any music...</text>
    </binding>
    <binding template="TileSquare310x310TextList02" branding="logo" contentId="http://orydberg.com/Posts/2013/5_AudioInTheBrowser.aspx">
      <text id="Text2">Audio In The Browser</text>
      <text id="Text3">How to sort a C# List</text>
      <text id="3">Basics of CSS3 styling of HTML5 blog post</text>
    </binding>
  </visual>
</tile>
If you create your own Notification file you also need to change the browserconfig.xml – file a bit cleaner with the polling-uri tags. As you can see in the code bellow, I have put 3 polling-uri tags, the reason for this is that I want to have 3 (5 is maximum) headlines from the blog posts that are circulated in the Live Tile. This really means that first the Live Tile shows something from polling-uri 1 and then the text from number 2 and then the text from number 3 and after that it start on number 1 again.
<?xml version="1.0" encoding="utf-8" ?>
<browserconfig>
  <msapplication>
    <tile>
      <square70x70logo src="images/win8LogoSmall.png"/>
      <square150x150logo src="images/win8LogoMedium.png"/>
      <wide310x150logo src="images/win8LogoWide.png"/>
      <square310x310logo src="images/win8LogoLarge.png"/>
      <TileColor>#6CBD45</TileColor>
    </tile>
    <notification>
      <polling-uri src="http://orydberg.azurewebsites.net/Notifications/TileNotifications.xml"/>
      <polling-uri2 src="http://orydberg.azurewebsites.net/Notifications/TileNotifications2.xml"/>
      <polling-uri3 src="http://orydberg.azurewebsites.net/Notifications/TileNotifications3.xml"/>
      <frequency>360</frequency>
      <cycle>1</cycle>
    </notification>
  </msapplication>
</browserconfig>
How is it all connected
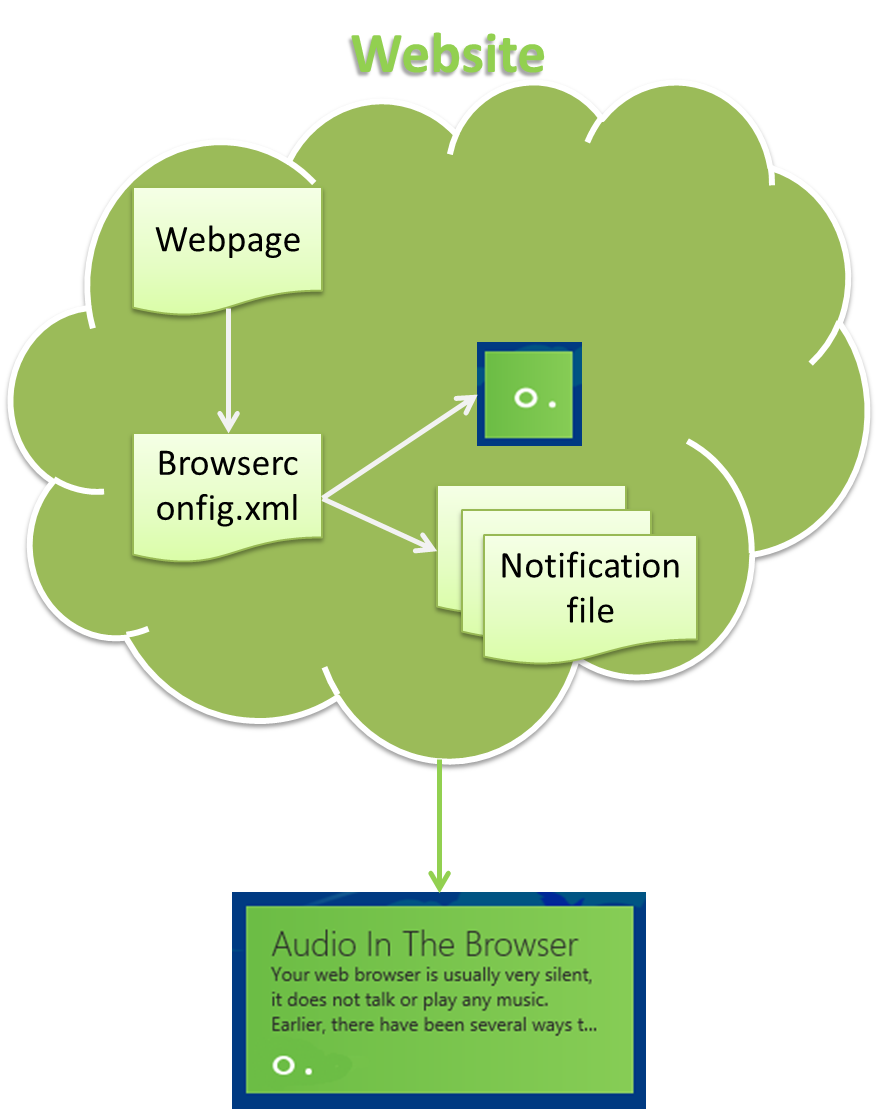
I have summarized my file design of the website Live Tile that I have been creating in this blog post in the info graphic below. I did a few redesigns of my solution along the way in this post, but the final design could be viewed in the info graphic. If I try to put the summary in words also, first the webpage points to the browserconfig.xml file. Then that file points to the images and the Tile Notification files. The Live Tile in Windows 8.1 then puts all this information together and displays the updates from the website.
How to pin a website on start screen
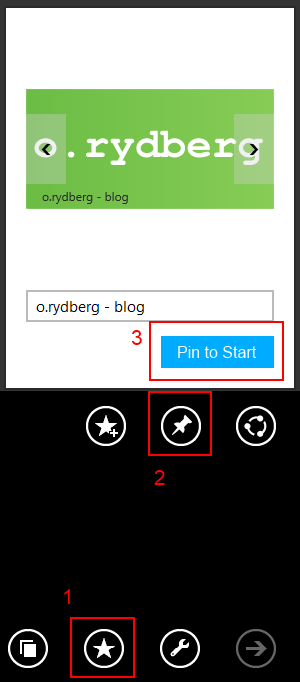
I have talked a lot about how to build a Tile for Windows 8.1, but I have not told you yet how to pin a webpage to the start screen. But it’s fairly simple thing to do. First you need to open Internet Explorer (does not work in the desktop version). Then open the navigation bar in the bottom of the screen by right clicking at an empty space on the web page. Then this black panel opens and you could click on 1 the star, 2 the pin, 3 Pin to Start.
You can do a lot more things with Live Tiles in Windows 8.1, but I will stop here for now. I think that it's a very interesting concept to let also webpages or web applications to update Live Tiles in Windows. This is very good for users, so that they can pin things that interest them on the start screen and that does not matter if Tile belongs to a web page or Window application. It makes the start screen very focused on the information that user is interested in.
Interesting links: